
Discover Python and Patterns (23): Create Levels
In this post, I want to show you how to load a level created by Tiled, a free level editor.
This post is part of the Discover Python and Patterns series
Assets
To follow this post, you need the image files that contain the tilesets of our game. You can download them here:
Tiled Map Editor
Tiled is free software you can download here: thorbjorn.itch.io/tiled
It allows for creating maps based on tiles:
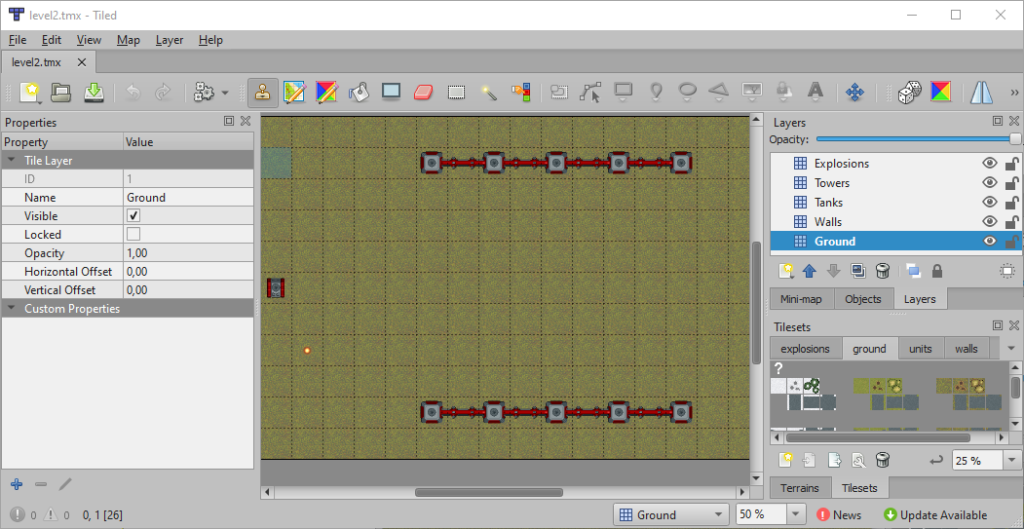
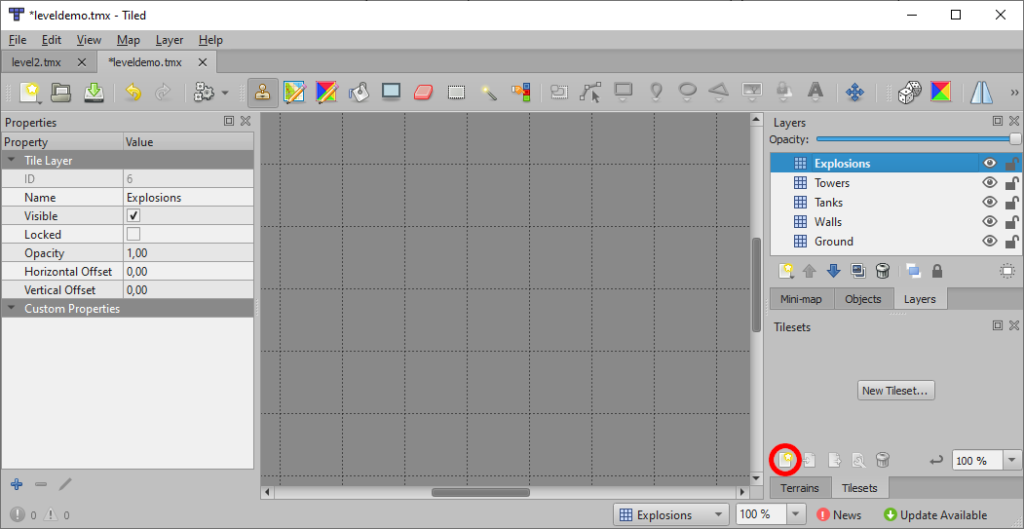
Its interface is organized in the following way:
- The top bar, below the menu, shows all the current maps. In this screenshot, there is a single map "level2.tmx";
- To the left, you can see the properties of an item. In this screenshot, we see the properties of the ground layer;
- In the center, you can see the map;
- Top right, there is a list of layers. In this screenshot, you can see the five layers we use in the program;
- Bottom right, there are all the available tilesets. In this screenshot, you can see the layers we use in the program.
Create a new level
In the menu, select File / New / New Map.... The following dialog appears:
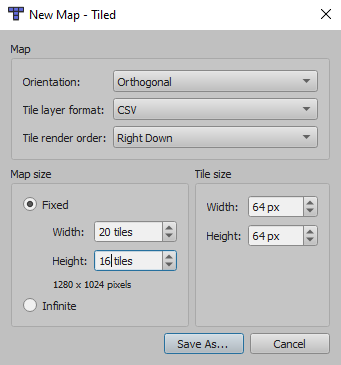
In the "Map" box:
- Orientation: select Orthogonal
- Tile layer format: choose any
- The render order: choose any
In the "Map size" box:
- Select Fixed
- Width: choose the width of your level (in tiles, not pixels!)
- Height: same for the height
In the "Tile size" box:
- Width: type 64
- Height type 64
Click Save as..., and select the location and name of your level (.tmx file).
Create the layers
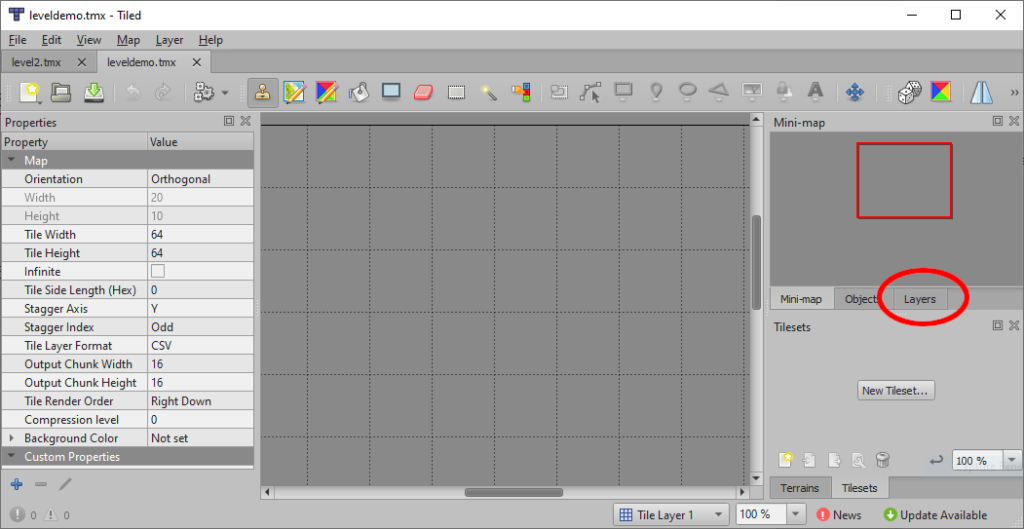
Top right of Tiled interface, there is a list of layers. If it is not the case, select the layers tab:
I propose to create the following layers:
- Ground layer: decorative items we can walk on
- Walls layer: impassable decorative items
- Tanks layer: location of tanks
- Towers layer: location of towers
- Explosions layer: top animations
Ground and walls layers correspond to the two first layers in our game (items of index 0 and 1 in the layers attribute of the UserInterface).
Tanks and towers layers contain the locations of all units and correspond to the third layer in our game (the item of index 2 in the layers attribute of the UserInterface). I use two layers in Tiled so I can know who is playable and who is an enemy. Otherwise, we would have to detect it using the coordinates in a tileset. I don't recommend it since it creates a dependency between tilesets layout and the game. In other words, if you (or a player mod) update a tileset, you will also have to update the code. With two layers in Tiled, whatever the tilesets, player and non-player units are always correctly identified.
The explosions layer contains the top animation. I use it to define the tileset for the bullets and the explosions and correspond to the two last layers in our game. We could also create two layers: one for the bullets and one for the explosions, in the case where we want to use different tilesets.
Let's now create these layers in Tiled. First, rename the first layer to "Ground": double click on the current name ("Tile layer 1") and type "Ground". Note that naming the layers is not mandatory, but it helps during the edition of the map.
Add a new layer using the first icon in the layers toolbar:
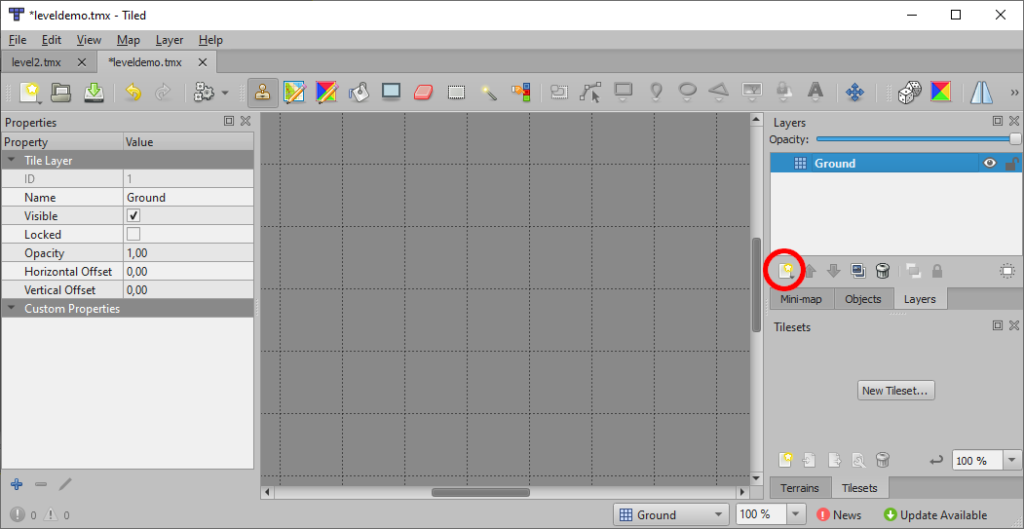
A menu appears: select Tile Layer. Rename this second layer to "Walls".
Note that this second layer appears on top of the first. It means that, during rendering, Tiled first draws the bottom layer ("Ground"), and then the top layer ("Walls"), as in our game. If you don't set the right order, one layer can hide all the others.
Repeat for all the remaining layers: "Tanks", "Towers" and "Explosions".
Create the tilesets
Bottom right, you can create a new tileset using the first icon:
The following dialog appears:

Click Browse... and select the "gound.png" image file that contains the tileset for the background (you can download this file and the other at the beginning of this post).
Make sure that Embed in map is checked, and click OK.
Repeat for "walls.png", "units.png" and "explosions.png".
Edit the level
You can edit the level in the center part of the Tiled interface.
First, select the layer you want to work on by left-clicking on its name. For instance, if the ground layer is selected:
Then, select one of the tilesets in the bottom right part. In the example above, we selected the ground tileset.
Finally, choose one tile and start drawing the map. If you can't draw, make sure that the "Stamp Brush" is selected in the top bar. If you need to remove a tile, choose the "Eraser" in the top bar.
Note that Tiled allows you to use tiles from any tileset for any layer. It is not the case for our game, where a layer can only use tiles from a single tileset. When creating the level, pay attention to this; otherwise, we won't be able to load it.
You can now create the level. For the tanks layer, put a single tank tile to define the starting position of the player. Note that we could put several tanks, but our program can't handle several players or several tanks controlled by one player for now (it is not difficult to implement thanks to our design, you can try it as an exercise).
For the explosions layer, put a single tile from the explosions tileset. It is to define which tileset is used by the explosions layer in our program.
Once editing is complete, you can save the level. In the next post, I'll show you how to load it with Python.