
OpenGL 2D Facade (11): View and Keyboard
With the previous program, the size of the window depends on the size of the level, which is problematic when the level is large. In this post, I update the shader programs to get a fast translation of the display. I also add keyboard handling to the facade to let the user changes the view.
This post is part of the OpenGL 2D Facade series
Objective
I extended the previous level and added some trees. Then, the objective of this post is to move inside this level using the arrow keys:
Clipping and translation
If the scene is larger than the screen/rendering window, then OpenGL automatically performs the clipping. OpenGL never renders faces outside the screen. OpenGL runs it before the rasterization (the step that turns a mesh into pixel fragments), and it is highly optimized. In our case, even if the level was very large (millions of cells), we would have memory issues before seeing clipping overhead.
Consequently, to get a different view of the level, we only need to translate it. There are several ways to define this translation, and I propose to use the one that represents the cell to display at the top-left corner of the screen:
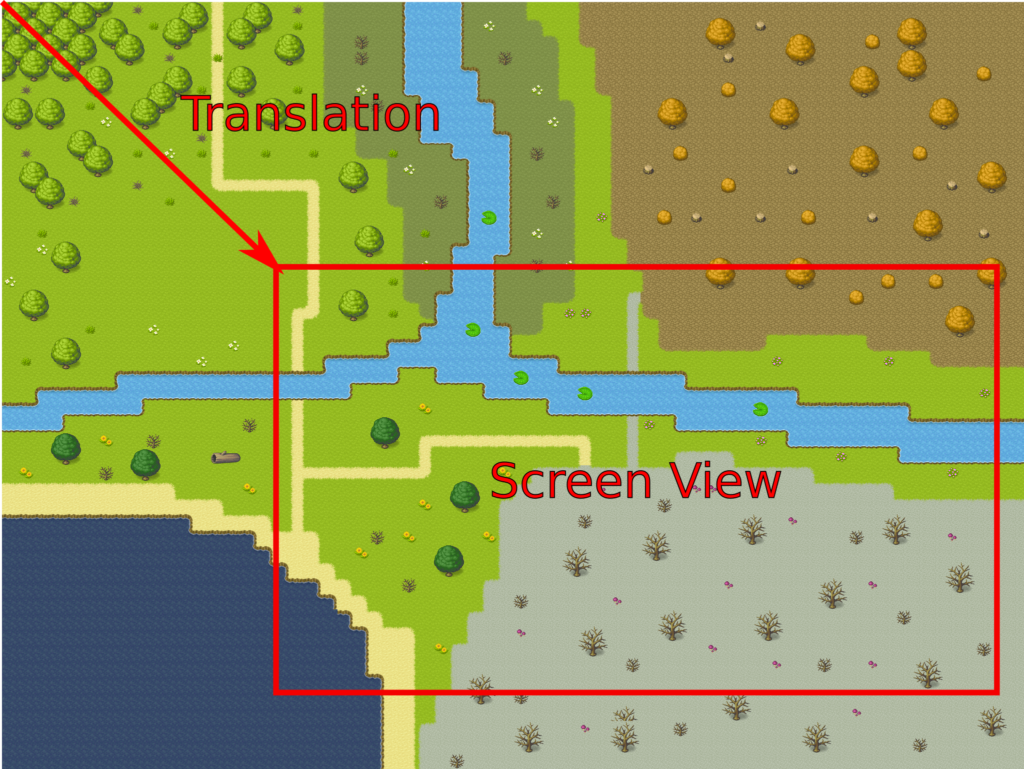
Furthermore, I propose to consider the translation as float values where round values correspond to cells. For instance, the vector (1.0,0.0) translates to the second cell of the first row. With float values, we can consider any view between cells; for instance, the vector (0.0, 0.5) translates to the middle of the second cell of the first column.
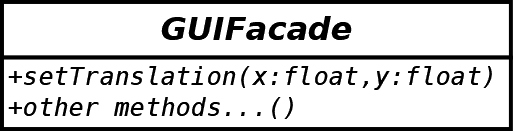
Considering the facade, we add a new method setTranslation() to define the current translation:
Fast translation with shaders
Vertex shader
In the vertex shader, we can add a computation to translate all vertices of the scene:
#version 330
layout (location=0) in vec4 vertex;
layout (location=1) in vec2 inputUV;
                   out vec2 outputUV;
uniform vec4 translation;
void main() {
    gl_Position = vertex + translation;
    outputUV = inputUV;
}
Firstly, note the declaration of the uniform variable at line 5:
uniform vec4 translation;This variable is a float vector with four values and is the same for all vertices. We can directly set it from Python (see below).
Secondly, note the computation of the vertex at line 7:
gl_Position = vertex + translation;The value of vertex is as before: this is the 4D float vector initialized from the Vertex Buffer Object (VBO) inside the Vertex Object Array (VAO).
Then we add the translation vector. This computation is fast: each core of the GPU runs one of these addition. Most GPUs can run trillions of operations every second, so in our case, it is unnoticeable compared to the same code run with Python!
Compute the translation vector
We first define two new private attributes in the OpenGLGUIFacade class: translationX and translationY. They contain the translation vector, as needed by the vertex shader.
The implementation of the setTranslation() method sets these attributes:
def setTranslation(self, x: float, y: float):
    if len(self.__layers) == 0:
        logging.warning("Can't set the translation because there are no layers")
        return
    layer = self.__layers[0]
    self.__translationX = -x * layer.screenTileWidth
    self.__translationY = y * layer.screenTileHeight
The arguments (x,y) are cell coordinates, as defined in the previous section. We need to translate them to OpenGL screen coordinates. We already have the required information: all layers perform this translation, using the size of a tile in OpenGL screen coordinates.
Set the translation vector
Right after the activation of the shader program (with glUseProgram()) and before the rendering of the layer, we set the uniform variable in the vertex shader:
translationShaderVar = glGetUniformLocation(self.__shaderProgramId, "translation")
glUniform4f(translationShaderVar,
            self.__translationX,
            self.__translationY,
            0.0, 0.0)
The first line gets the location of the variable in the shader program. It returns a value required for any operation on this variable.
The remaining lines set the translation variable. It is a vector with four values: the two first ones are the 2D translation, and the two last ones are related to the depth (not used).
Keyboard handling
About the keyboard handling, I only do a quick presentation in this section. If you want more, you can go to:
- For an overview: AWT GUI Facade (8): Keyboard and key sequences
- For a detailed description: Learn Design Patterns with Game Programming, Chapter 3, Section 3.3.
Also, note that the facade user now has to run the main game loop himself, and calls the usual Game Loop pattern methods in the facade.
Facade with keyboard handling
We extend the facade the following new attributes, methods, and classes:
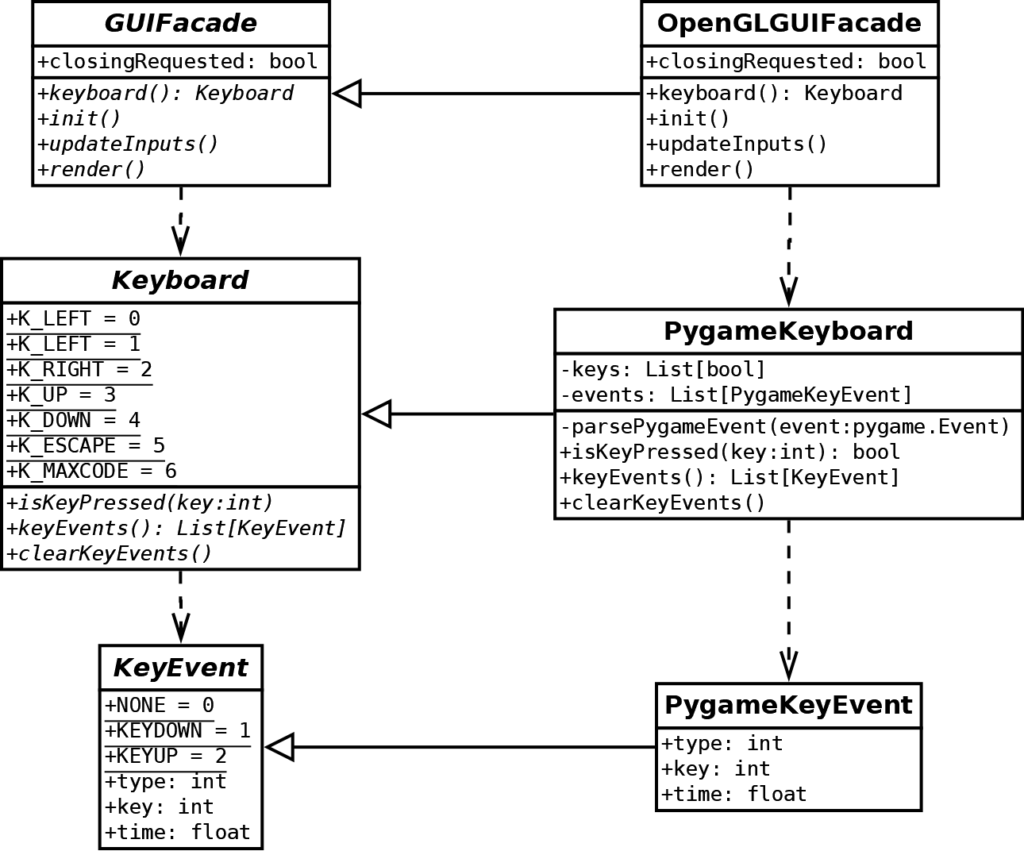
In the GUIFacade class:
- The
closingRequestedproperty returnsTrueif the window has to be closed; there is also a setter so the facade user can change this value; - The
keyboard()method returns theKeyboardclass implementation; - The
init()method initializes the internal facade data (to call before the beginning of the main game loop); - The
updateInputs()method updates keyboard data (to call before parsing the keyboard state or events); - The
render()method to trigger the rendering of the OpenGL scene.
In the Keyboard class:
- The static variables
K_XXXdefine codes for each key of the keyboard. We only consider the ones required for this post; - The
keyEventsproperty returns the list of key events; - The
isKeyPressed()returnsTrueifkeyis currently pressed; - The
clearKeyEvents()clears the list of key events.
In the KeyEvent class:
- The static variables define codes for event types;
- The
typeproperty returns the event type (key up, key down, ...). - The
keyproperty returns the key code, as defined in theKeyboardclass; - The
timeproperty returns the time when the event occurs.
Note that the implementation of the keyboard facade classes starts with Pygame because they only depend on Pygame. We never use OpenGL for keyboard handling.
Main game loop
The facade user now handles the main game loop:
guiFacade.init()
translationX = 0.0
translationY = 0.0
minTranslationX = 0
minTranslationY = 0
maxTranslationX = levelWidth - guiFacade.screenWidth / groundTileWidth
maxTranslationY = levelHeight - guiFacade.screenHeight / groundTileHeight
while not guiFacade.closingRequested:
    # Update inputs state
    guiFacade.updateInputs()

    # Keyboard key single press
    keyboard = guiFacade.keyboard
    for keyEvent in keyboard.keyEvents:
        if keyEvent.type == KeyEvent.KEYDOWN:
            if keyEvent.key == Keyboard.K_ESCAPE:
                guiFacade.closingRequested = True
                break
    keyboard.clearKeyEvents()

    # Keyboard key multi/continuous press
    if keyboard.isKeyPressed(Keyboard.K_LEFT):
        translationX -= 1.0
    if keyboard.isKeyPressed(Keyboard.K_RIGHT):
        translationX += 1.0
    if keyboard.isKeyPressed(Keyboard.K_UP):
        translationY -= 1.0
    if keyboard.isKeyPressed(Keyboard.K_DOWN):
        translationY += 1.0

    if translationX < minTranslationX:
        translationX = minTranslationX
    if translationY < minTranslationY:
        translationY = minTranslationY
    if translationX >= maxTranslationX:
        translationX = maxTranslationX
    if translationY >= maxTranslationY:
        translationY = maxTranslationY

    guiFacade.setTranslation(translationX, translationY)

    # Render scene
    guiFacade.render()
Line 1 inits the internal facade data. In the case of the OpenGL implementation, it creates the shaders and the clock to limit the refresh rate.
Lines 2-3 define two variables for the translation, in cell coordinates.
Lines 4-7 define the minimum and maximum translation values, such that the user can't view outside the level. Note that it does not handle levels smaller than the screen.
Line 8 starts the main game loop and repeat until closing is requested.
Line 10 updates the inputs state with the updateInputs() method of the GUIFacade class. In our case, the implementation parses the Pygame events:
def updateInputs(self):
    for event in pygame.event.get():
        if event.type == pygame.QUIT:
            self.__closingRequested = True
        else:
            self.__keyboard.parsePygameEvent(event)
The parsePygameEvent() method of the PygameKeyboard class adds a key event when we found a pygame.KEYDOWN or pygame.KEYUP event.
Lines 13-19 check if the user pressed the escape key (NB: it is a one-time press event, not a continuous keypress). If it is the case, we set the request closing state of the facade to True, which stops the game loop.
Lines 22-29 update the translation according to the currently pressed arrow keys. Note that it does not consider one-time press events, but the current state of the keyboard. As a result, it handles multiple key presses. For instance, if the user presses the right and down arrows simultaneously, we increase translationX and translationY.
Lines 31-38 ensure that the translation is valid.
Line 40 sends the translation to the facade.
Line 43 renders the scene, and the loop is complete.
Final program
In the next post, we'll how to render and move characters in the level.