
OpenGL 2D Facade (24): Z-Buffer
In this post, I show a first application of the OpenGL Z-Buffer, which allows a scene rendering without the need to sort tiles.
This post is part of the OpenGL 2D Facade series
Objective
To check that the implementation works fine, we want to hide the character behind the top of the trees:
Tiles sorting
The usual approach to get this result is to sort tiles at each time we render a frame. Then, we draw tiles from back to front.
Let's take an example to illustrate this with three layers:
- A background layer (ex: grass) always behind all others;
- A middle layer (ex: trees);
- A front layer with moving elements (ex: characters).
We render each tile of each layer at some location on a grid (row, column). Even if we add a shift for the moving elements, we can also consider that they are located on a cell. Then, we assign a depth value for each tile.
The tiles in the background layer are always in the back: we can assign them the same depth, let's say 1024.
For the tiles in the two other layers, it depends on their row. All tiles in the same row have the same depth, assuming no tiles are larger than a column. Then, we need to interleave the depths between the row of layers, for instance:
- Middle layer, first row: depth 1023
- Font layer, first row: depth 1022
- Middle layer, second row: depth 1021
- Font layer, second row: depth 1020
- etc.
For the moving elements, these depth values can change for every frame. For instance, if a character moves from the second row to the first row, its depth value goes from 1020 to 1022.
Once we assigned all depths, we sort all tiles from the highest depth value to the lowest and draw them accordingly.
This approach works fine but costs some resources. Using the OpenGL Z-Buffer, we can avoid these computations and save CPU time for other tasks!
Limitations
The approach is not perfect: we can have issues with blendings in some cases. For instance, if trees cast shadows outside their tile, the rendering won't be correct because we draw trees before characters. If a character enters the area of a tree shadow, it won't be shadowed. We can solve this with the creation of a tree shadow layer we render after the characters layer. It is a solution, but it starts to be a bit complicated. Things can get even more complex if there are light effects accross layers.
OpenGL Z-Buffer
Depth and Z value
The approach with the OpenGL Z-Buffer is simple: compute the depths as before, and assign a Z value for each tile using these depths. Then, let the GPU do the job! Note that if we have blending, we still need to render layers from back to front. For instance, trees in the example have a shadow: we must draw the background first to blend the shadow with the green of the grass.
Init the Z-Buffer
OpenGL does not enable the Z-Buffer default; we have to set it up (for instance in the init() function of the game):
glEnable(GL_DEPTH_TEST)
glDepthRange(0, 1)
glDepthFunc(GL_LESS)
glClearDepth(1.0)
Line 1 enables the Z-Buffer.
Line 2 tells that the lowest Z value is 0 and the highest one is 1. This setup is the one that leads to the highest Z-Buffer accuracy.
Line 3 defines the Z-order: the highest values are in the background while the lowest ones are in the front.
Line 4 defines the value used by glClear() to clear the Z-Buffer. A value of 1.0 is the highest Z value, OpenGL renders all tiles. If we choose 0.0, OpenGL does not draw any tiles.
We also need to add alpha test. Otherwise, all pixels of a tile, including the transparent ones, set a Z-Buffer value. We can change that in the following way:
glEnable(GL_ALPHA_TEST)
glAlphaFunc(GL_GREATER, 0.01)
Line 1 enables alpha test. All properties of a pixel, including the Z-Buffer value, are only updated if it passes this test.
Line 2 defines the test: we update a pixel if its alpha is greater than 0.01.
Clear the Z-Buffer
At the beginning of each frame rendering, we call glClear() with the GL_DEPTH_BUFFER_BIT flag to clear the Z-Buffer:
glClear(GL_COLOR_BUFFER_BIT | GL_DEPTH_BUFFER_BIT)Z-Buffer non-linearity
Now the need to compute the Z value of each tile according to a depth value. The problem is that the Z-Buffer is not linear: it depends on the inverse of Z:
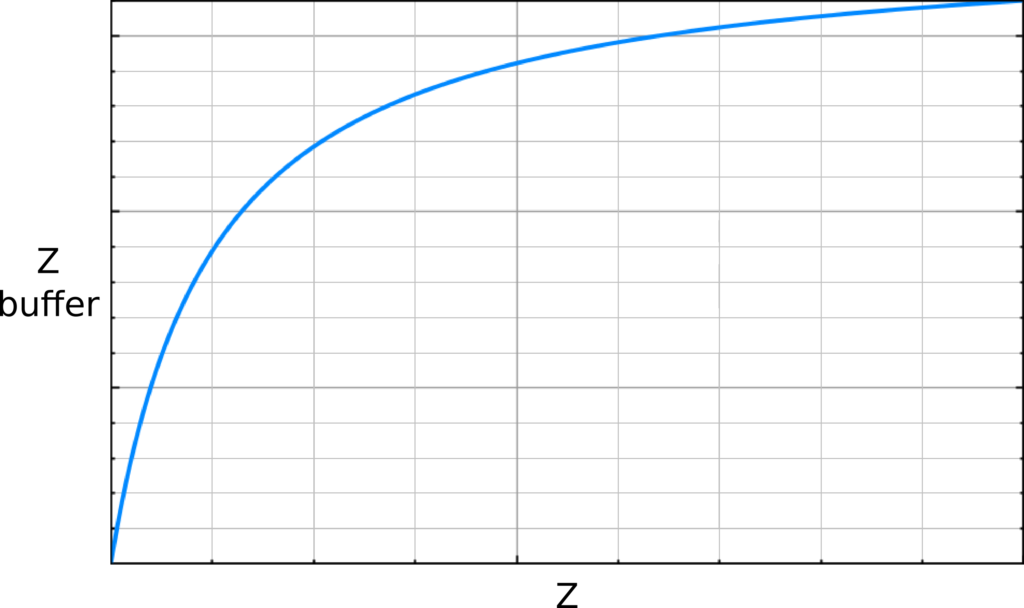
OpenGL uses this mapping to increase the resolution of the Z-Buffer in the front and decrease it in the back. When doing 3D rendering, it is relevant since we can easily see errors close to the camera/eyes but not far away. For 2D rendering, we don't need this feature, but there is no way to disable it. Anyway, we must consider it; otherwise, we will have issues with large Z values. For instance, OpenGL can map Z values of 0.98 and 0.99 to the same Z-Buffer value.
The mapping from Z values to Z-Buffer values is the following:
z_buffer_value = (1 << N) * (a + (b / z))with:
a = zFar / ( zFar - zNear )
b = zFar * zNear / ( zNear - zFar )
N is the number of bits used by OpenGL for the Z-Buffer. Most GPU can handle 24 bits, and the minimum is 16 bits.
zNear and zFar is the range of Z value we want to consider. For our 2D case, there is no single good range. All we need is values that cover well 32-bit float precision. For instance zNear=0.001 and zFar=1.0 is a valid setup.
Invert the Z-Buffer mapping
We have the Z-Buffer mapping, but what we need is the opposite. We want to set a Z value with Z-Buffer. In this case, the mapping is reversed:
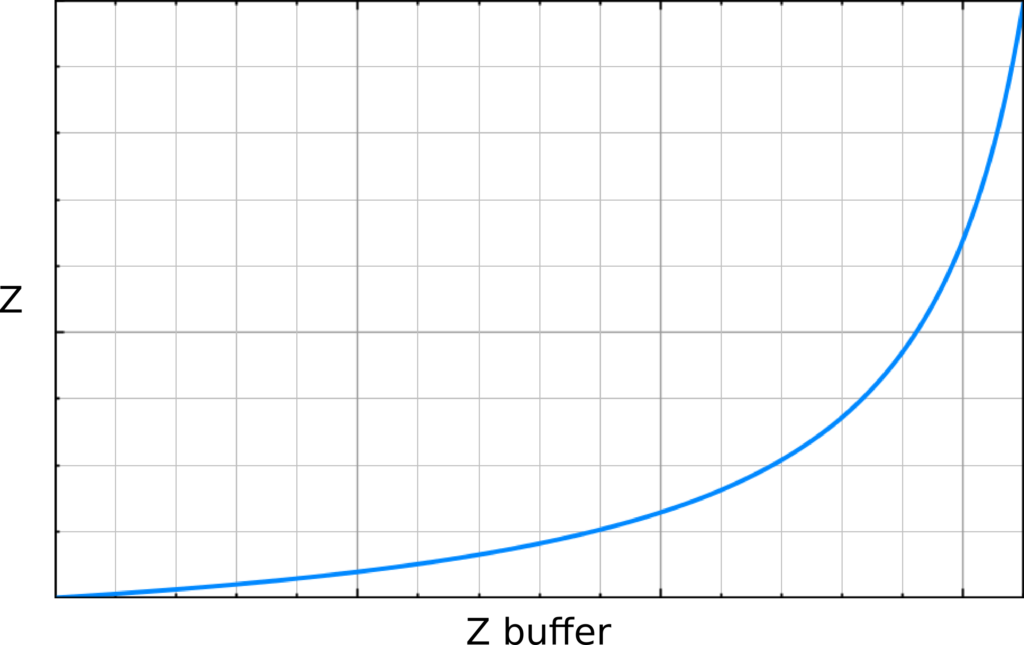
The formula is:
z = ((1 << N) * b) / (z_buffer_value - (k * a))Set tile depths
We gather all these computations in a ZBuffer class:
class ZBuffer:
    zNear = 0.001
    zFar = 1.0
    maxDepth = 65536
    a = maxDepth * zFar / (zFar - zNear)
    b = maxDepth * zFar * zNear / (zNear - zFar)

    @staticmethod
    def depth2z(depth: float) -> float:
        return ZBuffer.b / (depth - ZBuffer.a)

    @staticmethod
    def z2depth(z: float) -> float:
        return ZBuffer.a + ZBuffer.b / z
Then, in the OpenGLLayer class, we add a method setFaceDepth() to update the Z value of a face:
def setFaceDepth(self, faceIndex: int, depth: float):
    assert 0 <= faceIndex < self.__vertices.shape[0]
    self.__vertices[faceIndex, :, 2] = ZBuffer.depth2z(depth)
We also add a setDepths() method that can compute the Z values for a range of faces:
def setDepths(self, depth: float, range_: Union[None, range] = None):
    if range_ is None:
        self.__vertices[..., 2] = ZBuffer.depth2z(depth)
    else:
        self.__vertices[range_, :, 2] = ZBuffer.depth2z(depth)
With these parameters, we can use 65536 depth values. Then, we compute a depth value for each tile and only have to call setFaceDepth(). Thanks to these methods, we don't have to worry about non-linearities!
Code update
There are many updates in the code, and a lot of them are not related to OpenGL. I added layers for trees and characters, and renderers that translate game state data into GUI components. I won't detail them here; I'll do a series on these topics later. If you can't wait, have a look to "Learn Design Patterns with Game Programming".
Considering the Z-Buffer, we need to compute the depths for each tile. For the static ones, we can do it only once when we load the region. We add a new method layersChanged() to run the computation of these depths:
def layersChanged(self):
    depth = ZBuffer.maxDepth - 1
    for layerGroup in self.__layerGroups:
        if layerGroup is None:
            continue
        maxIndex = 0
        for layer in layerGroup:
            if layer is None:
                continue
            maxIndex += 1
        maxDepth = depth
        index = 0
        for layer in layerGroup:
            if layer is None:
                continue
            depth = min(depth, layer.updateDepths(maxDepth, index, maxIndex))
            index += 1
It calls a method updateDepths(), which is specific to each layer class. For instance, the UILayer class has the following one:
def updateDepths(self, depth: int, index: int, maxIndex: int) -> int:
    self.setDepths(depth - index)
    return depth - index - 1
In each case, the idea is to allocate depths for one interleave range, and return the smallest depth value allocated. For a simple case like UILayer, we only need one depth value. For more complex cases like GridLayer, we need has many values as there are rows:
def updateDepths(self, depth: int, index: int, maxIndex: int) -> int:
    faceIndex = 0
    for y in range(self.__height):
        self.setDepths(depth - index - y * maxIndex, range(faceIndex, faceIndex+self.__width))
        faceIndex += self.__width
    return depth - index - self.__height * maxIndex
The depth argument is the depth value of the layer group. The index argument is the index of the layer in the layer group, and maxIndex the number of layers in the layer group.
Consequently, the depth of a row y is: depth - index - y * maxIndex. For instance, if depth is 1024 and we are in the second layer of a group of 3 layers, then the row depth values are 1023, 1020, 1017, etc.
Final program
In the next post, I'll show how to get the Z value of a pixel, and what we can do with it.