
OpenGL 2D Facade (7): Draw a level
In this post, I show how to draw many tiles from a single-layer level created with Tiled. I also show how to take a screen capture with OpenGL.
This post is part of the OpenGL 2D Facade series
Objective
In the previous post, we drew a single tile, thanks to "magic" formulas to compute the coordinates in the texture and the screen. We can repeat these computations to render a level (with a single layer, we'll see later how to handle more):
Note: I am using free tiles created by Pipoya. I extracted some of them to build a tileset for this post; you can find more on the itch.io page: pipoya.itch.io/pipoya-rpg-tileset-32x32.
Create raw level data
I propose to use Tiled to create a level with 30 columns and 20 rows. I don't describe Tiled in this post; you can get details here.
The trick is to save the level in a CSV format, and then copy the tile ids in the <data encoding="csv"> XML tag:
<?xml version="1.0" encoding="UTF-8"?>
<map version="1.2" tiledversion="1.3.1" orientation="orthogonal" renderorder="right-down" compressionlevel="0" width="30" height="20" tilewidth="32" tileheight="32" infinite="0" nextlayerid="3" nextobjectid="1">
 <editorsettings>
  <export target="level0..tmx" format="tmx"/>
 </editorsettings>
 <tileset firstgid="1" name="grass" tilewidth="32" tileheight="32" tilecount="1024" columns="32">
  <image source="grass.png" width="1024" height="1024"/>
 </tileset>
 <layer id="1" name="Ground" width="30" height="20">
  <data encoding="csv">
255,255,255,53,255,255,255,255,255,246,247,247,247,247,247,247,247,247,247,248,255,255,46,47,47,47,47,47,47,47,
255,255,255,53,255,255,255,255,255,246,247,247,247,247,247,247,247,247,247,248,255,255,46,47,47,47,47,47,47,47,
255,255,255,53,255,255,255,255,255,246,247,247,247,247,247,247,247,247,247,248,255,255,78,110,47,47,47,47,47,47,
255,255,255,53,255,255,255,255,255,246,247,247,247,247,247,247,247,247,247,248,255,255,255,46,47,47,47,47,47,47,
255,255,255,53,255,255,255,255,255,246,247,247,247,247,247,247,247,247,247,248,255,255,255,78,110,47,47,47,47,47,
255,255,255,53,255,255,255,255,255,246,247,247,247,247,247,247,247,247,247,248,255,255,255,255,46,47,47,47,47,47,
255,255,255,53,255,255,255,255,255,278,310,247,247,247,247,247,247,309,279,280,255,255,255,57,172,47,47,47,47,47,
255,255,49,88,255,255,255,255,255,255,278,247,247,247,247,247,247,248,255,255,255,255,255,61,78,110,47,47,47,47,
255,255,53,255,255,255,255,255,255,255,255,278,279,279,279,279,279,280,255,255,255,255,255,61,255,46,47,47,47,47,
255,255,53,255,255,255,255,255,255,255,255,255,255,255,255,255,255,255,255,255,255,255,255,61,255,78,79,79,79,79,
255,255,53,255,255,255,255,255,255,255,255,255,255,255,255,255,255,255,255,255,255,255,255,61,255,255,255,255,255,255,
255,255,53,255,255,255,255,255,255,255,255,255,255,255,255,255,255,255,255,255,255,255,255,61,255,255,255,255,255,255,
255,255,53,255,255,255,255,255,255,255,255,255,255,255,255,255,255,255,255,255,255,255,255,61,255,255,255,255,255,255,
255,255,53,255,255,255,255,255,255,255,255,255,255,255,255,255,255,255,255,255,255,255,255,61,255,255,255,255,255,255,
255,255,53,255,255,255,255,255,255,255,255,255,255,255,255,255,255,255,255,255,255,255,255,61,255,255,255,255,255,255,
255,255,53,255,255,255,255,255,255,255,49,19,19,19,19,19,19,19,19,19,50,255,255,61,255,255,255,255,255,255,
255,255,53,255,255,255,255,255,255,255,53,255,255,255,255,255,255,255,255,255,53,255,255,61,255,255,30,31,31,31,
255,255,51,19,19,19,19,19,19,19,82,255,255,255,255,255,255,30,31,31,185,31,31,185,31,31,158,63,63,63,
255,255,53,255,255,255,255,255,255,255,255,255,255,255,255,255,30,158,63,63,63,63,63,63,63,63,63,63,63,63,
255,255,53,255,255,255,255,255,255,255,255,255,255,255,255,30,63,63,63,63,63,63,63,63,63,63,63,63,63,63
</data>
 </layer>
</map>
Then, paste these ids in the python program to initialize a Numpy array:
rawLevel = np.array([
    255, 255, 255, 53, 255, 255, 255, 255, 255, 246, 247, 247, 247, 247, 247, 247, 247, 247, 247, 248, 255, 255, 46, 47, 47, 47, 47, 47, 47, 47,
    255, 255, 255, 53, 255, 255, 255, 255, 255, 246, 247, 247, 247, 247, 247, 247, 247, 247, 247, 248, 255, 255, 46, 47, 47, 47, 47, 47, 47, 47,
    255, 255, 255, 53, 255, 255, 255, 255, 255, 246, 247, 247, 247, 247, 247, 247, 247, 247, 247, 248, 255, 255, 78, 110, 47, 47, 47, 47, 47, 47,
    255, 255, 255, 53, 255, 255, 255, 255, 255, 246, 247, 247, 247, 247, 247, 247, 247, 247, 247, 248, 255, 255, 255, 46, 47, 47, 47, 47, 47, 47,
    255, 255, 255, 53, 255, 255, 255, 255, 255, 246, 247, 247, 247, 247, 247, 247, 247, 247, 247, 248, 255, 255, 255, 78, 110, 47, 47, 47, 47, 47,
    255, 255, 255, 53, 255, 255, 255, 255, 255, 246, 247, 247, 247, 247, 247, 247, 247, 247, 247, 248, 255, 255, 255, 255, 46, 47, 47, 47, 47, 47,
    255, 255, 255, 53, 255, 255, 255, 255, 255, 278, 310, 247, 247, 247, 247, 247, 247, 309, 279, 280, 255, 255, 255, 57, 172, 47, 47, 47, 47, 47,
    255, 255, 49, 88, 255, 255, 255, 255, 255, 255, 278, 247, 247, 247, 247, 247, 247, 248, 255, 255, 255, 255, 255, 61, 78, 110, 47, 47, 47, 47,
    255, 255, 53, 255, 255, 255, 255, 255, 255, 255, 255, 278, 279, 279, 279, 279, 279, 280, 255, 255, 255, 255, 255, 61, 255, 46, 47, 47, 47, 47,
    255, 255, 53, 255, 255, 255, 255, 255, 255, 255, 255, 255, 255, 255, 255, 255, 255, 255, 255, 255, 255, 255, 255, 61, 255, 78, 79, 79, 79, 79,
    255, 255, 53, 255, 255, 255, 255, 255, 255, 255, 255, 255, 255, 255, 255, 255, 255, 255, 255, 255, 255, 255, 255, 61, 255, 255, 255, 255, 255,
    255,
    255, 255, 53, 255, 255, 255, 255, 255, 255, 255, 255, 255, 255, 255, 255, 255, 255, 255, 255, 255, 255, 255, 255, 61, 255, 255, 255, 255, 255,
    255,
    255, 255, 53, 255, 255, 255, 255, 255, 255, 255, 255, 255, 255, 255, 255, 255, 255, 255, 255, 255, 255, 255, 255, 61, 255, 255, 255, 255, 255,
    255,
    255, 255, 53, 255, 255, 255, 255, 255, 255, 255, 255, 255, 255, 255, 255, 255, 255, 255, 255, 255, 255, 255, 255, 61, 255, 255, 255, 255, 255,
    255,
    255, 255, 53, 255, 255, 255, 255, 255, 255, 255, 255, 255, 255, 255, 255, 255, 255, 255, 255, 255, 255, 255, 255, 61, 255, 255, 255, 255, 255,
    255,
    255, 255, 53, 255, 255, 255, 255, 255, 255, 255, 49, 19, 19, 19, 19, 19, 19, 19, 19, 19, 50, 255, 255, 61, 255, 255, 255, 255, 255, 255,
    255, 255, 53, 255, 255, 255, 255, 255, 255, 255, 53, 255, 255, 255, 255, 255, 255, 255, 255, 255, 53, 255, 255, 61, 255, 255, 30, 31, 31, 31,
    255, 255, 51, 19, 19, 19, 19, 19, 19, 19, 82, 255, 255, 255, 255, 255, 255, 30, 31, 31, 185, 31, 31, 185, 31, 31, 158, 63, 63, 63,
    255, 255, 53, 255, 255, 255, 255, 255, 255, 255, 255, 255, 255, 255, 255, 255, 30, 158, 63, 63, 63, 63, 63, 63, 63, 63, 63, 63, 63, 63,
    255, 255, 53, 255, 255, 255, 255, 255, 255, 255, 255, 255, 255, 255, 255, 30, 63, 63, 63, 63, 63, 63, 63, 63, 63, 63, 63, 63, 63, 63
], dtype=np.int32)
Convert raw level data
The rawLevel array is a one-dimensional array with 30*20=600 values. To ease the rendering, we need a three-dimensional array with 30 per 20 (x,y) coordinates:
textureTilesPerRow = textureWidth // tileWidth
levelWidth = 30
levelHeight = 20
rawLevel = rawLevel.reshape((levelHeight, levelWidth))
level = np.empty((levelWidth, levelHeight, 2), dtype=np.int32)
for y in range(levelHeight):
    for x in range(levelWidth):
        tileId = rawLevel[y, x] - 1
        level[x, y, 0] = tileId % textureTilesPerRow
        level[x, y, 1] = tileId // textureTilesPerRow
Line 1 computes the number of tiles per row in the tileset. We need this value because Tiled defines tile ids from left to right and then top to bottom.
Lines 2-3 store the with and height in variables.
Line 4 reshapes the raw level: its new shape is (20, 30). As presented in previous posts, Numpy stores data per row: the first index of a 2D array is the row and the second one the column. As a result, the 2D shape of the raw level is (levelHeight, levelWidth) and not (levelWidth, levelHeight).
Line 5 creates a level Numpy array with shape (levelWidth, levelHeight, 2) and 32-bit integers. The Numpy function empty() does not initialize the content of the array. We should use this function with care since the array can have any values. In this example, it is not a problem since we set every cell of this array right after.
Last lines iterate through all the cells in the level. For each cell of coordinates (x,y) it reads the id of the tile (line 7). Note that we subtract one because Tiled reserves the zero value for empty cells. Then, we compute the x coordinates of the tile from the id (line 8), and similarly for the y coordinates (line 9).
Create the window
We create the window as before, except for the size of the rendering area:
screenWidth = tileWidth * levelWidth
screenHeight = tileHeight * levelHeight
screenTileWidth = 2 * float(tileWidth) / float(screenWidth)
screenTileHeight = 2 * float(tileHeight) / float(screenHeight)
screenSize = (screenWidth, screenHeight)
pygame.display.set_mode(screenSize, pygame.DOUBLEBUF | pygame.OPENGL)
pygame.display.set_caption("OpenGL 2D Facade - https://www.patternsgameprog.com/")
The window size defined in lines 1-2 now depends on the size of the level.
Mesh data
The mesh data is composed of vertices, faces (vertices index), and a UV map (coordinates in the texture). This time, we create as many rectangles as there are cells in the level:
vertices = np.empty([levelWidth, levelHeight, 4, 2], dtype=np.float32)
uvMap = np.empty([levelWidth, levelHeight, 4, 2], dtype=np.float32)
faces = np.empty([levelWidth, levelHeight, 4], dtype=np.uint)
faceCount = 0
for y in range(levelHeight):
    for x in range(levelWidth):
        spriteScreenX1 = -1 + x * screenTileWidth
        spriteScreenY1 = 1 - y * screenTileHeight
        spriteScreenX2 = spriteScreenX1 + screenTileWidth
        spriteScreenY2 = spriteScreenY1 - screenTileHeight
        vertices[x, y, 0] = [spriteScreenX1, spriteScreenY2]
        vertices[x, y, 1] = [spriteScreenX1, spriteScreenY1]
        vertices[x, y, 2] = [spriteScreenX2, spriteScreenY1]
        vertices[x, y, 3] = [spriteScreenX2, spriteScreenY2]

        spriteTextureX1 = level[x, y, 0] * textureTileWidth
        spriteTextureY1 = level[x, y, 1] * textureTileHeight
        spriteTextureX2 = spriteTextureX1 + textureTileWidth
        spriteTextureY2 = spriteTextureY1 + textureTileHeight
        uvMap[x, y, 0] = [spriteTextureX1, spriteTextureY2]
        uvMap[x, y, 1] = [spriteTextureX1, spriteTextureY1]
        uvMap[x, y, 2] = [spriteTextureX2, spriteTextureY1]
        uvMap[x, y, 3] = [spriteTextureX2, spriteTextureY2]

        faces[x, y, 0] = faceCount * 4
        faces[x, y, 1] = faceCount * 4 + 1
        faces[x, y, 2] = faceCount * 4 + 2
        faces[x, y, 3] = faceCount * 4 + 3
        faceCount += 1
Lines 1-3 create the Numpy arrays. There are levelWidth per levelHeight rectangles (or quads or faces). For vertices, there are four edges per rectangle, and each edge has a 2D coordinates on the screen. It is the same for uvMap, except that we are considering coordinates in the texture. For faces, there are four vertex indices per rectangle. Line 4 initializes a face counter. We use it to compute the current rectangle index in faces, and at the end of the creation, it is the total number of rectangles
Next lines iterate through all (x, y) coordinates of the level.
Lines 7-14 set the vertex coordinates for the rectangle on the screen corresponding to the (x, y) cell in the level. It is the same formula as in the previous post, except that we replace the (spriteGridX, spriteGridX) coordinates with (x, y).
Lines 16-23 set the UV coordinates for the rectangle in the texture corresponding to the (x, y) cell in the level). It is the same formula as in the previous post, except that we replace the (spriteTileX, spriteTileY) coordinates with the ones read in the level at (x, y).
Lines 25-28 set the vertex indices for the current rectangle. We define a new number for each vertex. As a result, there is no vertex shared by several rectangles. I'll show in a future post how to optimize this.
Screen capture
There are no more changes to the previous program regarding the rendering of the scene.
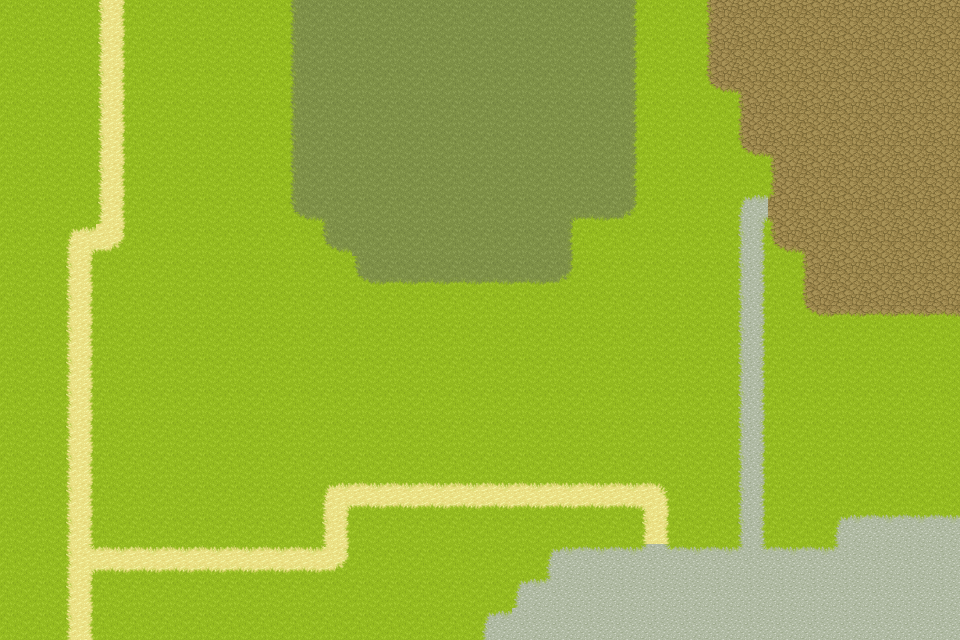
If you run this new program, you can see the level rendered in the window. It is not easy to check if the rendering is perfect; there is no way to zoom or count the pixels, for instance.
An excellent way to check a rendering is to take a screenshot: you can then open the image in an editor and zoom in anywhere to check that everything is fine.
This approach is not very handy and quite complicated when we will have animations. OpenGL offers a method for screenshots: we can use it to capture the screen content automatically:
glFlush()
glPixelStorei(GL_PACK_ALIGNMENT, 4)
data = glReadPixels(0, 0, screenWidth, screenHeight, GL_RGBA, GL_UNSIGNED_BYTE)
capture = np.frombuffer(data, dtype=np.uint8)
capture = capture.reshape(screenHeight, screenWidth, 4)
capture = np.flip(capture, axis=0)
Image.fromarray(capture).save("capture.png")
Remind that "screen content" for OpenGL is the rendering area of our program window; we won't get the entire screen content.
Line 1 asks OpenGL to wait for the execution of all processings. In fact, when you ask something to OpenGL, it is scheduled to the GPU, and may not happen immediately.
Line 2 defines the row alignment. We consider RGBA so 4-byte values, with this alignment, we get compact data.
Line 3 calls the glReadPixels() OpenGL function that reads the rendering area content. The four first arguments are the area we want (if this example, all the screen). The next argument, GL_RGBA, is the expected pixel format, and the last one, GL_UNSIGNED_BYTE, is the format for each channel value (one byte for Red, one byte for Green, etc.). The function returns a buffer with all values.
Line 4 converts the buffer into a Numpy array. The result is a one-dimensional array with screenHeightscreenWidth4 bytes.
Line 5 converts the one-dimensional array into a three-dimensional one. Have a look at the post on textures to understand why the shape is (screenHeight, screenWidth, 4) and not (screenWidth, screenHeight, 4).
Line 6 inverts the Y-axis (again, OpenGL Y coordinate is bottom-up).
Line 7 converts the Numpy array into a PIL image and save it to "capture.png".
Final program
In the next post, we'll start the creation of the facade.